Contents
What’s going on, guys?
Today, I’m going to answer some stretching-related questions I’ve been getting.
Many people wonder if stretching actually increases your vertical jump.
The short answer is yes, it will help you jump higher.
However, stretching is not the be-all and end-all of vertical jumping, meaning that your flexibility is not the only factor determining how high you can jump.
It’s important to note that your vertical consists of an array of different components such as speed, power, mobility, stability, and flexibility.
Flexibility helps your vertical jump, but it’s not the most important factor.
Today I’ll show you a few different stretches that I like to do to keep my body healthy and maximize my vertical leap, allowing me to fly high.
I’ll explain why these stretches are necessary to keep you up to speed.
Before we begin, I’d like to point out that these stretches can be done anywhere; you don’t have to go to the gym and can do them from the comfort of your own home.
You’ll need to find yourself a mat (a basic mat will do), but if you don’t have one you can use a towel (less recommended).
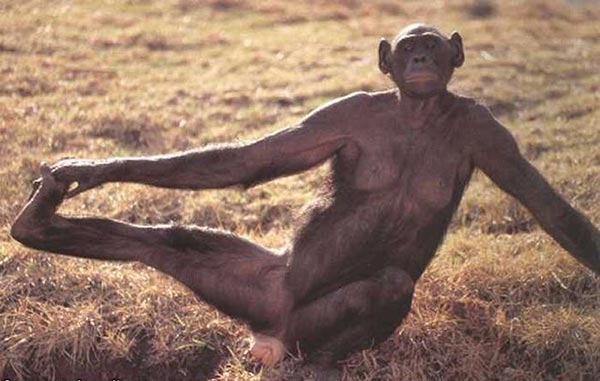
1. Seated Hamstring Stretch
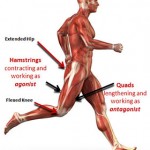
The first stretch is a seated hamstring stretch. Hamstrings are the muscles in the back of your leg and we like to keep these nice and loose. A tight posterior chain can cause issues like knee pain, hip pain, ankle pain and back pain.
The hamstring muscles are very integral to the functioning of your legs, they play a very important role and if they’re very tight they can pullout stuff.
This is a basic seated hamstring stretch and there are many varieties to it, but the version I talk about here is a modified hurdler stretch and it goes like this…
Tuck your foot into your other leg and place your other leg straight and in front of you. Keep your foot flexed backward (by pulling your toes towards your knee) and don’t point your toe away from you, this will keep get the calf muscle involved in the stretch too.
Contrary to popular belief, it’s not about reaching your toe or reaching as far as you can. Instead, think about laying your chest on your thigh. The way I like to do this is to place my hands underneath my calf and simply draw my chest towards my thigh.
I hold this position for about 15-30 seconds and then switch legs.

You can also use a towel by throwing it around your foot and it will help you pull yourself. This practice is good for beginners because if you’re not flexible it feels hurts to stretch, and if you have a really tight posterior chain it’ll be hard for you to pull yourself down. Using a towel or even someone pushing you from the back can assist in those initial stages when developing your flexibility.
2. Seated Cross Stretch
Now we’re going to stretch out our glutes and a bit of the IT band (Illiotibial band). It’s important to stretch the IT band because if it gets tight it can cause problem with the knees.
A good way to emphasize this stretch is to find yourself a thin wall and place your hands on it for some balance (or use a chair/stool behind you to hold yourself).
Now take one foot and cross it on top of your other leg (just above your knee), and with the leg that you’re standing on simply start sitting towards the floor. As you sit down you’ll notice that you get a good stretch through your glutes and you should also feel your IT band which runs down the side of your leg activated.
Just as before, hold this stretch for 15-30 seconds and then do the other leg.
You can do this stretch on the floor too by simply laying on your back crossing your foot over, then reach through your legs and simply pull that leg towards your chest. This is a nice variation and you get a similar effect as if you were standing. I personally prefer the standing version because I feel like I can get deeper into the stretch, but if you feel more comfortable lying on your back then that’s fine too.
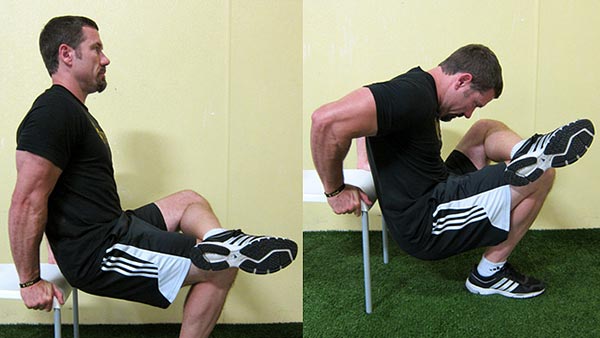
The important thing is to do this stretch because it helps to keep your legs and knees healthy.
3. The Stair Calf Stretch
Last but not least, we’re going to take a peek at how I like to stretch my calves.
A tight calf muscle can attribute to a wide array of lower body pains and believe it or not, even upper body pain.
Find a stair (any type of stair will work). You basically want anything that is above ground level so you can lower your heels without them touching the floor.
The goal here is that your heels will travel below that 180 degrees angle and float in the air.
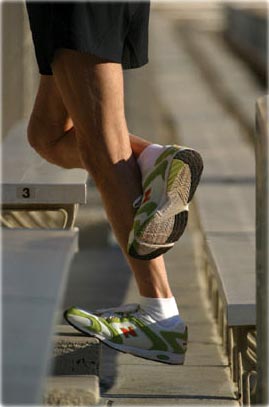
I like to do one leg at a time, but if you have really tight calves you can do 2 legs simultaneously because the extra body weight sinking into the stretch can put a lot of stress on the calf. Therefore, if you have tight calves you can start with 2 legs and once you’re comfortable with it you can move to one leg at a time.
Once you found yourself a step, place only the ball of your feet on it so that the rear part is in the air and release your ankles towards the floor. I like to put my other leg on the stretched calf and just let it sit.
You can also change the angle of the stretch by simply moving your toe slightly inwards to the mid-line of the body, this will help to stretch the outside of your calf, or you can turn your toe out to help stretch the inside of your calf. This way you can manipulate on which area of the calf you’d like to focus on.
Note
I typically like to leave these stretches to the end of a workout because they’re static, and static stretches are more for ensuring that the blood is flowing. In the beginning of a workout however, it’s better to do dynamic stretches to help blood flow begin.
You can actually increase your chance of injury by doing static type stretches in the beginning of your workout, so it’s better to save this type of stuff to the end of your workout.
It’s very important to remember that all these stretches do help in achieving a better vertical jump, yet stretching itself, is not the only factor that affects your jump.
These stretches are taken from 2 very successful vertical jump programs that I tried, one is the Jump Manual which needs no introduction, but the other is actually fairly new and called Vert Shock.
Vert Shock is a new program that was created by one of the best dunkers in the world (Justin Darlington) and it contains some of the best practices for increasing your vertical jump by integrating stretching strategically with other factors.
For more information on the Vert Shock program and more stretches like these, checkout this my Vert Shock review post below.
Links
1) Vert Shock Review: A Thorough Look at Adam Folker’s Vertical Jump Program and its Pros & Cons – https://jumpmanualblog.com/vert-shock-review-results-program/
2) Free Resource for Quick Inches – A free pdf ebook by Thincpro containing 4 hacks pro NBA & NFL players use that could add 4 inches to your vertical jump under one hour – https://jumpmanualblog.com/vert-shock-free-pdf-download/
2) verticaljumping.com | Stretching And Vertical Jump Performance improvement – http://www.verticaljumping.com/stretching.html
Last Updated on by Matthew Godley


Thanks a lot dude this was helpful asf. Happy you achieved your goal.